Designing reusable components
TL;DR - Plan the different part of your projects before you start coding. Try and separate implementation details from the general requirements of your project.
When working on a project, it’s always tempting to start coding immediately. While we might tell ourselves that this code is only a prototype and can later be thrown away, it seldom happens. Temporary solutions have the bad habit of becoming permanent. To make matters worse, we usually feel time pressures that hinder our ability to plan and spend time thinking about what we need to do.
In the new few weeks we’re going to publish a series of blog posts exploring different aspects of project organisation and management such as:
- Designing before coding
- Developing reusable components
- How to produce estimates
The objective of this article is to briefly go through the design of a generic component. By design we mean the work that is done before the actual coding. We use the term component to refer to a small part of a larger project. We will illustrate what is being discussed with a real component that I developed recently: the onboarding process of a mobile app.
Capturing requirements
The traditional software development process seems to imply that there is a magical way to know what our client might want. That it’s only a matter of sitting down and writing down all of these requirements before we start with development. The reality is far from that.
Requirements will change as the project is developed because in many instances your client or customer doesn’t really know what they want or it’s not possible to know at such an early stage. At this stage we should therefore aim to get a general picture of what we’re trying to produce before we write any code.
High-level requirements
We should start with the high-level requirements, that is requirements that are not specific to any design or implementation. This means asking questions like:
- What is our component supposed to do?
- Who will be using it?
- Where will it be used?
- What is our preferred outcome?
Brainstorming our ideas can be the right approach to capture as much information as possible.
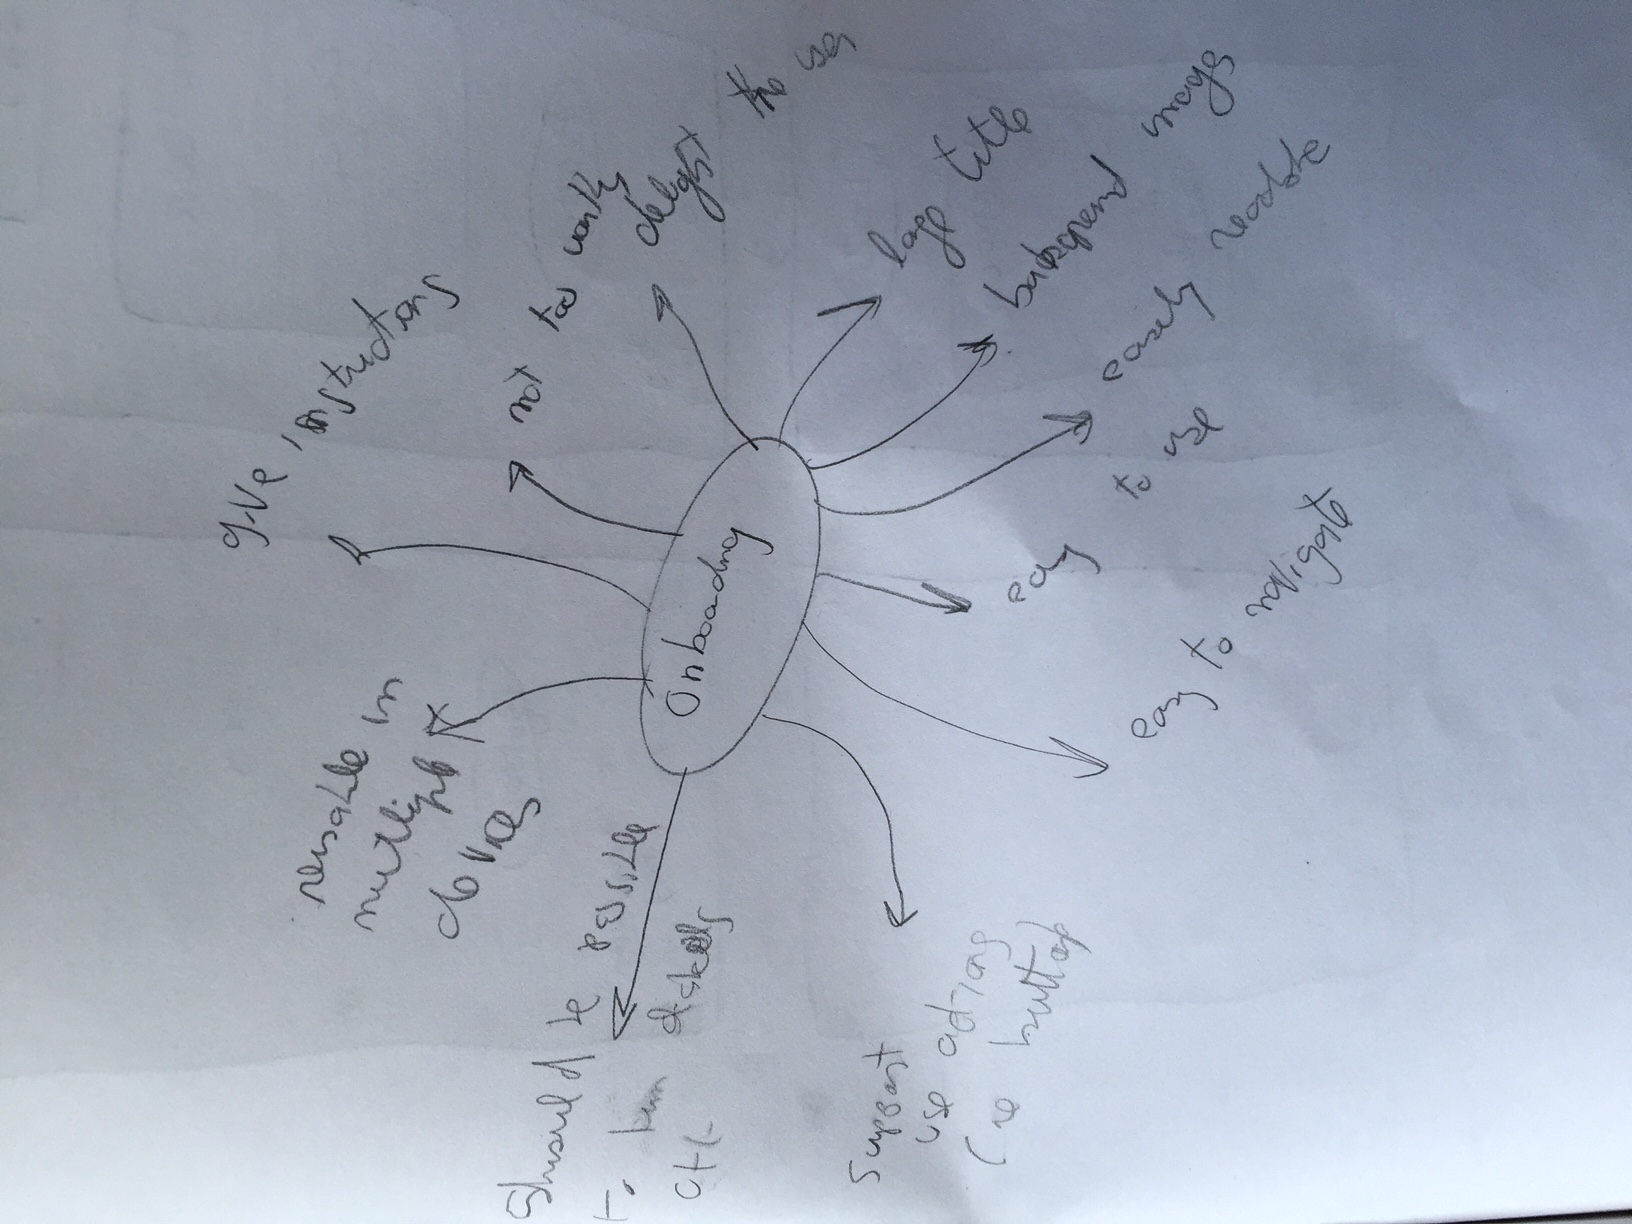
In the mobile onboarding example, after brainstorming our diagram could look like this:

In our onboarding example the requirements could be the following:
- Introduce the user to a new app
- For mobile phone and tablet users
- Delight the user
- Indicate possible actions that can be performed
- Easy to read instructions
Implementation specific requirements
After we’ve gathered our high-level requirements, we might concentrate on implementation-specific ones, which will usually stem from the high level requirements. We might ask ourselves questions such as:
- What screen sizes will it support?
- Will it have text or images?
- Will there be animatations?
- Will there be buttons or other UI components?
- Should we use a table, a grid, or some other layout?
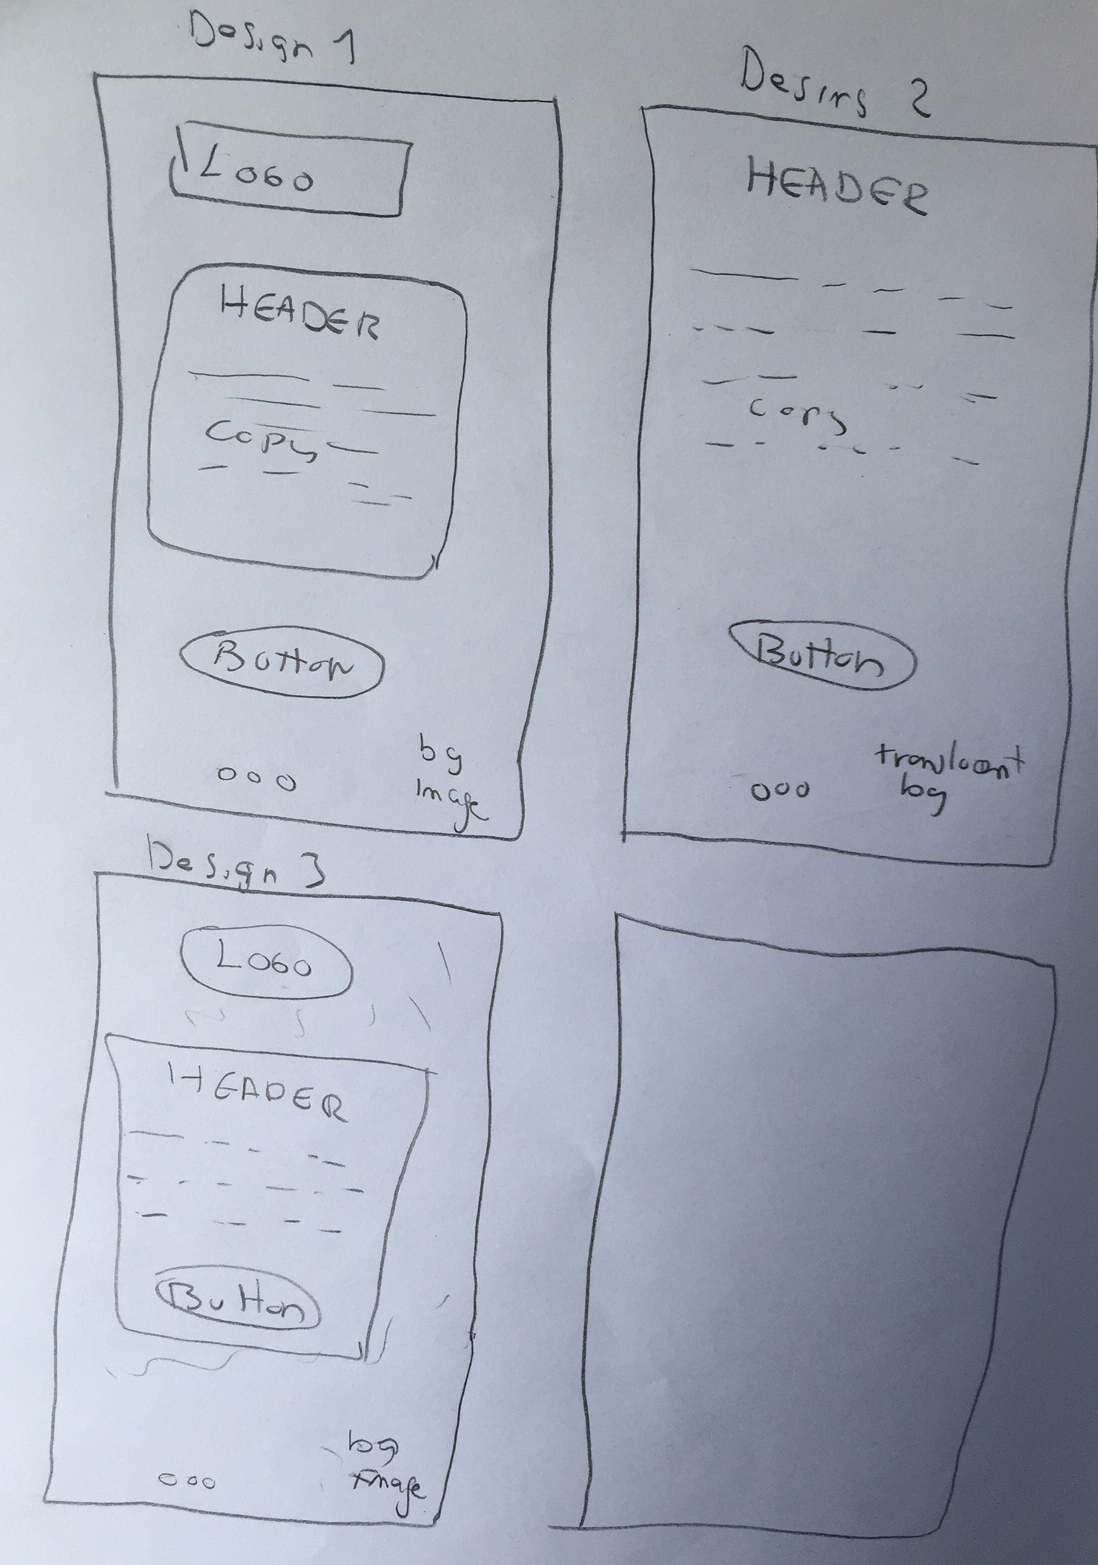
During this phase, I find it quite useful to do pencil drawings about what the component might look like (or diagrams if it’s an internal component without a UI).
A basic diagram used for reasoning about the onboarding component could look like this:

So, going back to our onboarding example, these might be some of the implementation-specific requirements:
- Must have a full-screen background image
- Must use pages to support multiple instructions
- There should be animations or effects when we change a page (for example a parallax effect)
- There should be a clear header plus a longer body copy
- It should be possible to have a button on every page that can be linked to an action
Designing
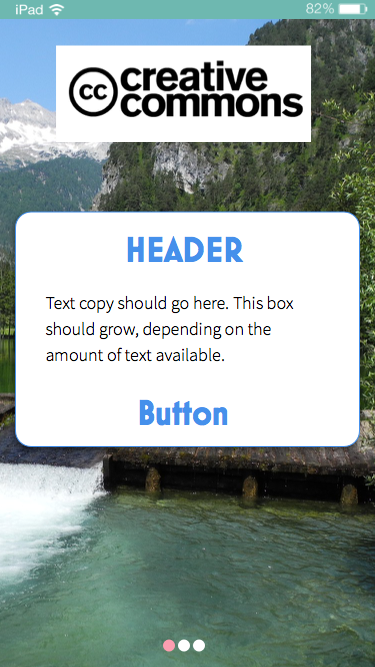
By now we should have as good as an idea as we can about the generic component we’re designing. It’s therefore a good time to start doing some visual prototyping that we can later on use for development. Through this process we might also discover more requirements as well. There are many tools out there for rapid prototyping, some more sophisticated than others. I’ve used Sketch because it’s easy to use and one can look at the design in the target device quite easily. Use whatever you feel more comfortable.
Onboarding example design prototype:

Through this iterative process you’ll end up with a design to implement as well as attributes that might need to be easily changeable to make your component generic. In our onboarding example, we decided that the following attributes should be customizable:
- Button placement
- Fonts
- Background image
- Animation speed
- Corner radius of body copy box
- Line width of body copy box
- Border colour
- Text aligment (justified, centred)
- Logo image
Even if you think that some of this attributes might seldom be changed, it’s better to code in a way that they’re customizable so there’s more flexibility in adjusting the component’s design when it’s actually implemented. There’s nothing more irritating than having to rewrite parts of your code because your customer or design team want the component to do something else. The later in a project that one needs to make changes, the more painful they can be.
Conclusion
The basic idea is to try and spend some time thinking about your component or project in a general way, before writing any code. This is likely to save you time and effort in the long run, as well as produce more generic code that can be reused in future projects.